Available nodes
What follows is a brief summary of each different node type. Each node type is described in full in their own section of this document.
Media Manager
The single Media Manager node:

represents all media in the project. Double click on it to open the Media Manager controls to allow clips to be imported, new media bins to be created, and all other media related operations.
Manual media bin
A Manual media bin node:
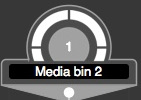
is shown for each manual media bin present in the project. A manual media bin is a bin containing clips which have been manually managed. The number in the middle of the node is the number of clips in the media bin. Double clicking on a media bin node opens up that media bin showing the clips it contains.
Smart media bin
A Smart media bin node:
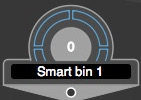
is shown for each smart media bin present in the project. A smart media bin is a bin containing clips which are automatically managed, for example defined by the contents of an EDL. The number in the middle of the node is the number of clips in the media bin. Double clicking on a media bin node opens up that media bin showing the clips it contains.
Digital Wet Gate
A Digital Wet Gate node:
is shown for every Digital Wet Gate present in the project. Double clicking on a Digital Wet Gate node opens up that Digital Wet Gate to be worked on. Digital Wet Gates are where fast automatic cleanup of film based formats are are performed.
Each Digital Wet Gate node comes with an attached control:

which can be used to cache the results of the Digital Wet Gate operations onto disk.
The white number at the top left of the control illustrates the number of clips
ready to be cached in the node. The blue number below illustrates the number of
clips already cached in the node.
Click this button  to start
caching all clips in the attached node.
to start
caching all clips in the attached node.
Please note that it is not a requirement that this node be disk-cached at all. The image data for an un-cached clip will be generated "on-the-fly" as required by PFClean. Only if the time to achieve this is prohibitive, for example preventing real-time playback during review, is it necessary to cache the clip to disk.
Note that if the node contains clips of multiple standards, caching will only be available if disk cache locations have been specified for all of those standards.
For further details of how to prepare disk cache locations, see the Managing cache locations section in the Project Manager chapter.
Note that this node can not be connected to a Telerack node.
Workbench
A Workbench node:
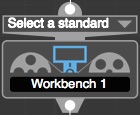
is shown for every Workbench present in the project. Double clicking on a Workbench node opens up that Workbench to be worked on. Workbenches are where manual and automatic restoration effects are applied.
When a clip is disconnected from a Workbench the effects on that clip are removed. However, this may be undesirables behaviour if, for example, the disconnection was accidental since it could result in lost work.
A preference option exists to control whether the effects applied by the Workbench are owned by the Workbench itself (and so are deleted when the clip is disconnected from the Workbench for whatever reason) or owned by the clip and so are re-applied if the clip is re-attached to a Workbench.
Telerack
A Telerack node:
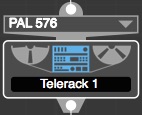
is shown for every Telerack present in the project. Double clicking on a Telerack node opens up that Telerack to be worked on. Teleracks are where fast automatic cleanup of tape based formats are performed.
Note that this node can not be connected to a Digital Wet Gate node.
Remaster
A Remaster node:

is shown for each remaster sequence present in the project. Double clicking on a Remaster node opens up that remaster sequence.
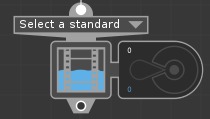
Standards
A Standards node:
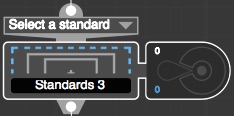
is shown for each Standards conversion node present in the project. Double clicking on the Standards item opens up that Standards conversion node.
Each Standards conversion node comes with an attached control:
which can be used to cache the results of the standards conversion operation onto disk.
The white number at the top left of the control illustrates the number of clips
ready to be cached in the node. The blue number below illustrates the number of
clips already cached in the node.
Click this button to start
caching all clips in the attached node.
Please note that it is not a requirement that this node be disk-cached at all. The image data for an un-cached clip will be generated "on-the-fly" as required by PFClean. Only if the time to achieve this is prohibitive, for example preventing real-time playback during review, is it necessary to cache the clip to disk.
Note that if the node contains clips of multiple standards, caching will only be available if disk cache locations have been specified for all of those standards.
For further details of how to prepare disk cache locations, see the Managing cache locations section in the Project Manager chapter.
File Out
The File Out node:
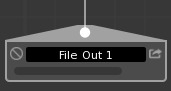
exports clips from PFClean.
To run the export click on the export button next to the File Out's name on the right.
The export is performed via the batch processing system and once submitted its status is shown in the item:

Clicking on the export button while it is highlighted blue selects the job in the batch panel for more control over the job, e.g. pausing and cancelling.
All File Out nodes in a project can be started by clicking the triangular render button in the main export panel that is shown at the bottom of the Workflow Manager when no nodes is selected:

The number in the top half of the export control illustrates the number of clips ready to be exported. The number in the bottom half shows the number of clips that have been exported.
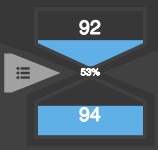
Clicking on the 3-line list button highlights the job in the batch panel for more control, e.g. pausing and cancelling.
Individual File Out nodes can be excluded from this operation by clicking the disable button next to the File Out node's name on the left.
Click on the File Out item to specify export parameters such as path and file format.