


Curves Editor
The Curves Editor provides access to animation curves generated by nodes in the tree.
The Curves Editor can be accessed for the current node by clicking on the  button to the left of the node controls. Please note that the Curves Editor is not available for all nodes, and will be disabled if there are no curves that can be displayed or edited by the current node.
Displaying curves
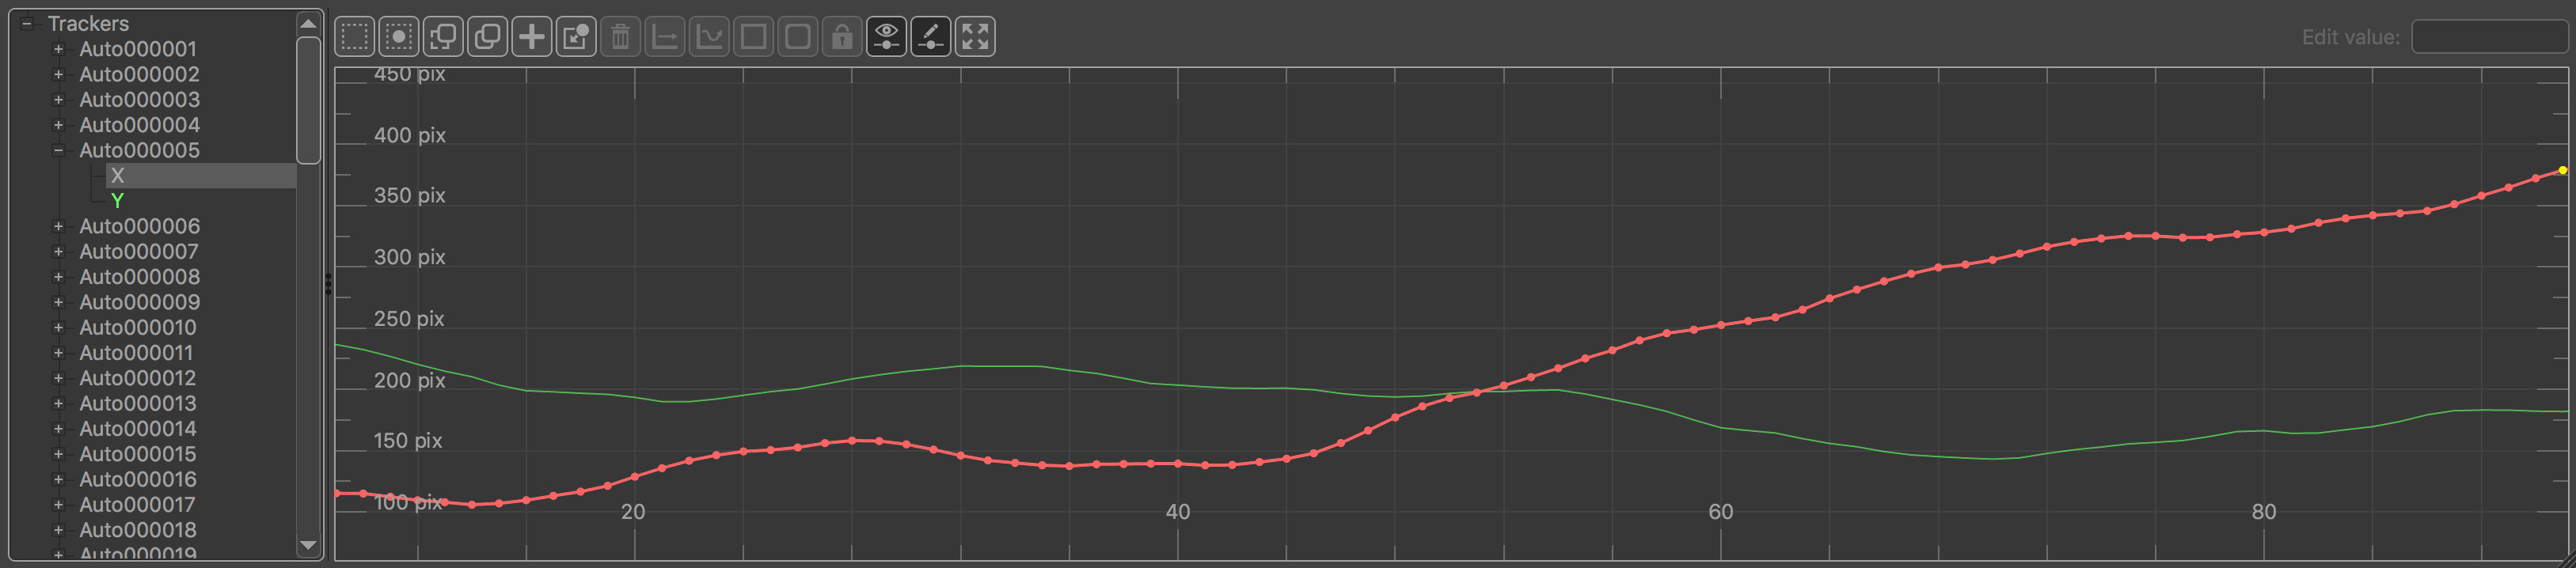
All available parameters are displayed in the list on the left. Individual components can be expanded or collapsed by clicking the + or - buttons next to each parameter name.
Clicking on a parameter will display the curve in the graph on the right. By default, this will also fit the viewport to all related curve parameters, although this can be avoided by holding the Control key whilst clicking on the curve. Holding the Shift key whilst clicking will fit the viewport to the single curve parameter instead of all.
Mouse controls
Click with the left mouse button and drag to change frame number.
Click and drag with the middle mouse button to zoom the curve editor.
Click and drag with the right mouse button to pan the curve editor
Mouse wheel can be used to adjust horizontal zoom.
Mouse wheel whilst holding the Option to adjust vertical zoom.
Editing curves
Once a curve is displayed, it can be edited by clicking the  button. Clicking this button again will stop all curve editing.
Mouse controls
Click and drag left mouse button whilst holding Control to draw a selection area and select multiple keyframes.
Left click and drag curve vertex to adjust a curve value. Holding the Control key will allow a single vertex to be positioned away from an integer frame number. Note than when calculating, exporting or viewing curves, the curve will be sampled at integer frame numbers.
Left click and drag with Option key held to move all selected vertices horizontally by integer frame numbers.
Buttons
Several buttons are available to control the display and help with curve editing:
 : When enabled, clicking and dragging with the left mouse button will draw a selection marquee allowing keyframes to be selected (Can also be done by holding the Control keyboard shortcut).
 : Select all or none of the vertices displayed in the curve editor.
 : Copy data from one displayed curve into the clipboard. This data can then be pasted onto another curve, or copied into a text editor or other application that supports clipboard interaction. This button is only available when one curve is displayed. Curves can be displayed or hidden using the named buttons that appear above the curve editor.
 : Paste data from the clipboard into the displayed curve. The Paste button is only available when one curve is displayed. Curves can be displayed or hidden using the named buttons that appear above the curve editor.
 : When this button is enabled and selection mode is active, the left mouse button can be used to draw a rectangle inside which new keyframes will be added to the curves (Selection mode can be activated by holding the Control keyboard shortcut).
 : Insert a new keyframe in all curves at the current frame.
 : Delete all selected keyframes.
 : Change all selected keyframes into linear points.
 : Change all selected keyframes into bezier points.
 : Simplify the selected keyframes to produce a curve with fewer points. Holding down the Shift key whilst clicking will display a popup editor allowing the simplification accuracy to be specified as a percentage of the overall curve height.
 : Smooth selected keyframes to produce a smoother curve.
 : Lock/unlock selected keyframes, preventing them from being adjusted during camera or object refinement. Locked keyframes are highlighted with a black circle.
 : Toggle display of keyframes.
- : Toggle edit mode, allowing curve vertices to be adjusted.
 : Fit the curve editor viewport to show all of the parameter curves. Holding the Shift key whilst clicking will fit the curve editor viewport to a single curve, rather than all parameter curves.
Edit Value: Assign a specific value on the vertical scale to selected keyframes.