


Enhance
Enhance nodes can be used to apply image enhancements to a clip to assist with tracking or other operations. After creating an Enhance node, it can be attached to any other node that has a blue indicator on an input label, as shown in the following screenshot:
Connecting an Enhance node in such a manner will apply the image enhancement to the specified clip. One enhance node can be connected to multiple indicators if required, with the same image enhancements applied to each clip.
Note that the enhancements are applied locally to the clip in the target node and are not passed down-stream. This allows, for example, a local modification to be made to assist with auto-tracking without affecting other nodes further down the tree.
Usage
The Enhance node editor contains various functions for adjusting the colour and appearance of the clip, grouped into a set of widgets labelled Marker Enhancement, Colour, Curves and Filter:
Image enhancements are applied in a left-to-right order, provided the corresponding widget is enabled. By default, marker enhancement is applied first, followed by colour, curves and filter. The sections can be re-ordered to change the order in which enhancements are applied.
Adjustment parameters can be saved to disk as an XML preset file, which
is stored in the user's /Users/USERNAME/Documents/The Pixel Farm/PFTrack/presets/enhance
folder.
Marker Enhancement
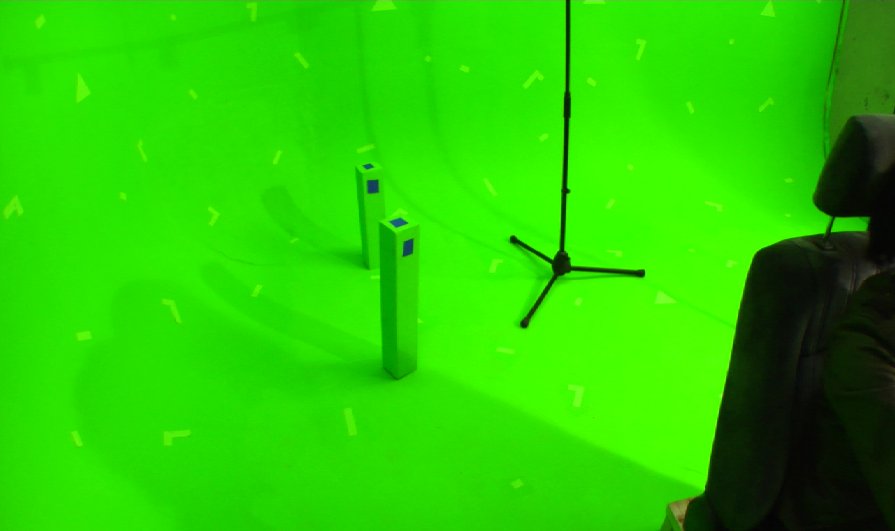
Marker enhancement can be used to increase the visibility of tracking markers, most often on green or blue-screen shots. Here is an example green-screen shot where the lighter coloured tracking markers have been picked out using marker enhancement:
Before:
After:
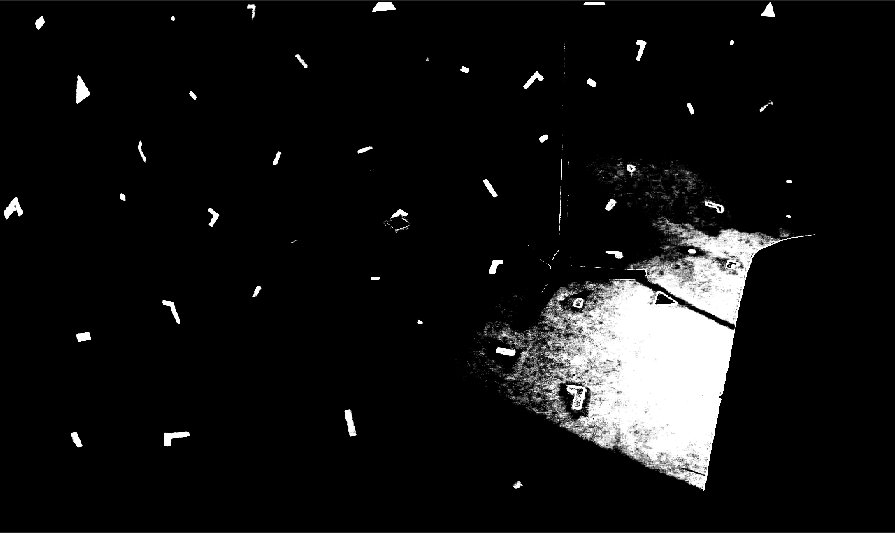
(Footage courtesy of http://www.hollywoodcamerawork.com/green-screen-plates.html)
Colour
The Colour controls provide straightforward red, green and blue channel adjustments, along with contrast, brightness, saturation and gamma sliders.
Curves
The Curves controls allow the red, green and blue channels to be adjusted according to a bezier curve. One final curve is available that will adjust all channels simultaneously.
Filter
The Filter controls can be used to remove high frequency noise from a clip, or blur or sharpen the image.
The size of the blur or sharpen filter is controlled by the Radius parameters (measured in pixels). When the Sharpen parameter is zero, a blur filter will be applied, otherwise a sharpen filter is applied according to the amount of sharpening specified by the parameter.
Controls
Load: Load an XML enhance preset file from disk.
Save: Save an XML enhance preset file to disk. The default
location to save presets is /Users/USERNAME/Documents/The Pixel Farm/PFTrack/presets/enhance
<, >: Cycle through the clip displayed in the Cinema window when the Enhance node is connected to multiple nodes.
Marker enhancement
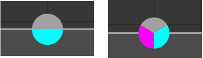
The colour bars show sampled colours as a vertical dotted line in each channel, along with the size of the enhancement region, and the slope controlling the mapping to a grey-scale image.
Colour range: The size of the colour range around the sample point that is mapped to grey-scale. Dragging the slider to the right will mean that more pixels are mapped to grey-scale. Colours outside of this range will be mapped to black.
Colour fall-off: The slope of the grey-scale mapping. Dragging the slider to the right will mean more colours are mapped to high grey-scale values.
Sample: When enabled, clicking in the Cinema window with the left mouse button will sample a pixel colour from the image. The image will be sampled just before marker enhancement is applied. Multiple samples can be take if required.
Reset: Remove all colour samples from the colour bars.
Colour space: Specify the colour space used for marker sampling. Options are RGB, YUV, YIQ and HLS.
Colour
Red: Increase or decrease values in the red channel.
Green: Increase of decrease values in the green channel.
Blue: Increase or decrease values in the blue channel
Contrast: Increase or decrease overall contrast in the image.
Brightness: Increase or decrease overall brightness in the image.
Saturation: Increase or decrease colour saturation in the image.
Gamma: Increase or decrease gamma adjustment in the image.
Any of the R buttons will reset the slider to its default value.
Curves
Click to create new vertices. Click and drag to move vertices or Bezier handles. Click on a vertex to delete it.
Channel: The Red, Green, Blue or All channels to adjust.
Reset: Reset the curve back to its original value.
Filter
The filtering options allow the image to be blurred or sharpened, or noise to be removed whilst protecting edges and other image details.
Radius: The radius of the filter used to blur or sharpen the image in each channel (measured in pixels). The default value is 0.
Sharpen: The amount of sharpening to apply. When this value is zero, a blur filter will be applied instead of a sharpen filter. The default value is 0.
Noise Removal %: The amount of noise to remove in each channel (default value is 0%).
Detail Protection %: The amount of edge detail to try to preserve in each channel (default value is 90%).
Noise removal colour space: The colour space to use for noise removal. Options are RGB, YUV, YIQ and YCbCr.
Gang: When enabled, adjustments to one channel parameter will automatically be applied to the other channels.
Keyboard shortcuts
Keyboard shortcuts can be customised in the Preferences.
| Enable Marker Enhancement | Shift+M |
| Sample Marker | Shift+S |
| Reset Marker | Shift+R |
| Enable Colour | Shift+C |
| Enable Curves | Shift+U |
| Reset Curves | Shift+E |
| Enable Filter | Shift+D |