Quick start
Setting up a PFBucket server is straightforward, and a Quick Start guide is available below.
Once you have installed the PFBucketd server daemon on a machine and activated your entitlements, those entitlements can be used by any workstation that is able to connect to your server over your network.
1. Create an entitlement bucket
If you haven't done so already, you need to place your product entitlements in a bucket before they can be activated on your server.
See the Bucket Management guide for further information on how to do this.
2. Install the PFBucketd server daemon
Now that your product entitlements are prepared, you can install the PFBucketd server daemon on your server.
Further details about the network ports used by the PFBucketd server daemon are available on the Network Configuration page, along with information to help you start and stop it if required.
3. Install the PFBucket desktop app
You now need to install the PFBucket desktop app.
This can be installed on the same machine as the PFBucketd server daemon if you wish, or you can install it on any other machine that can communicate with the server daemon over your local network, such as an IT administrator's laptop.
The PFBucket desktop app requires a temporary internet connection with The Pixel Farm's servers to activate or manage your entitlements, but once this is complete you can close the desktop app as no further outside network communication is necessary.
4. Log in to your PFBucket server
Once the PFBucket desktop app is running, you can use it to log in to your PFBucket server.
Open the 'Login/Logout' tab, enter your PFAccount number, and log in to your PFBucket server by providing its local IP address, and the name and password of the bucket you wish to activate on your server:
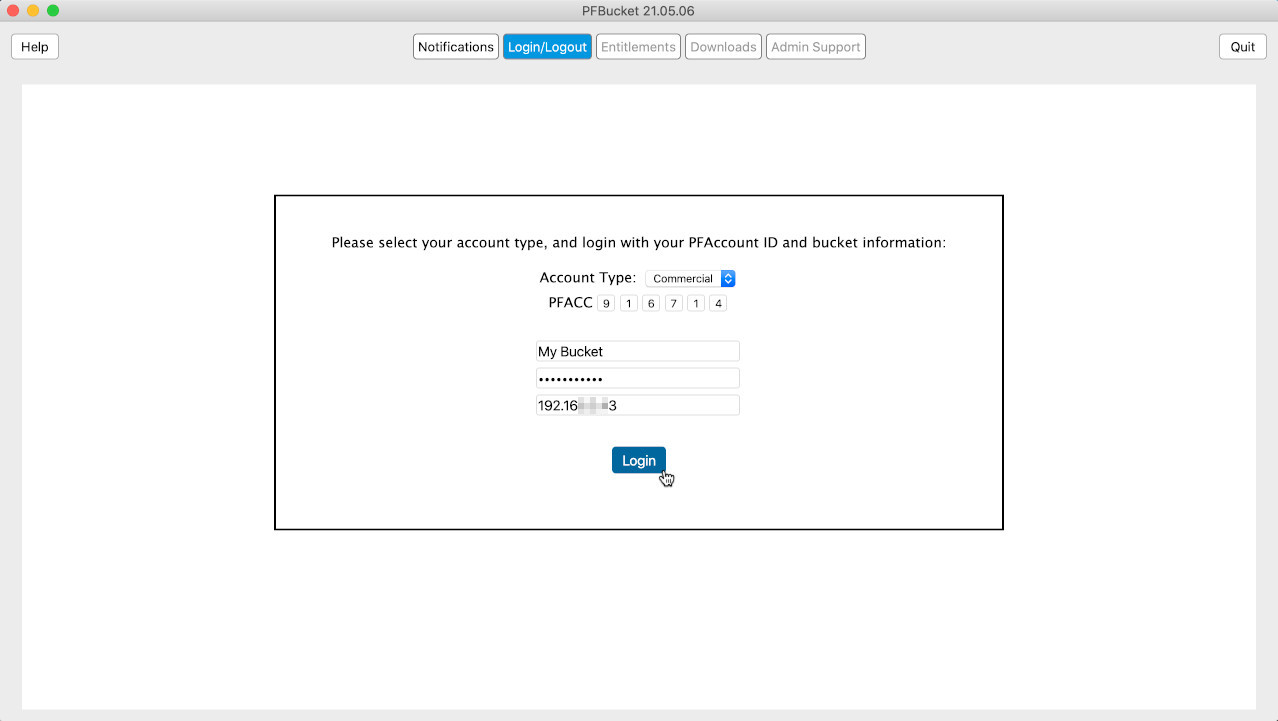
If you are running the PFBucket desktop app on the same machine where you installed your PFBucketd server daemon, you can use the local IP address 127.0.0.1
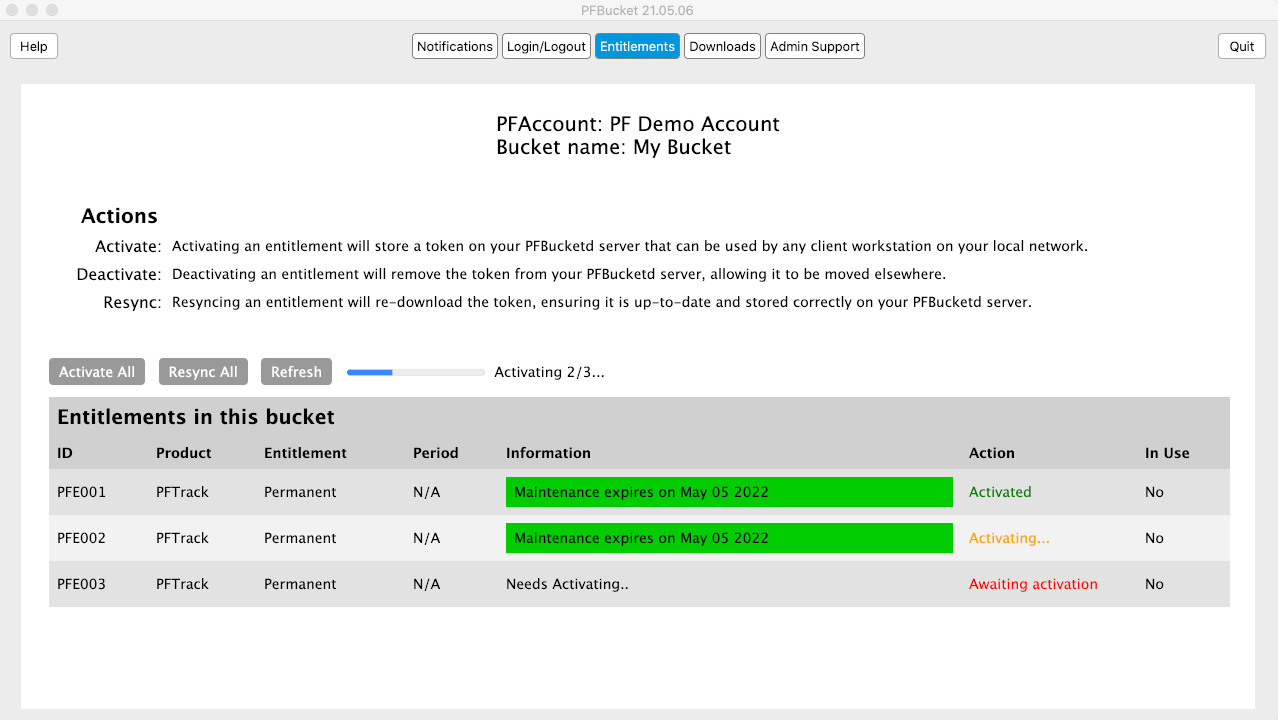
5. Activate your entitlements
After logging in, the Entitlements page will show a list of all your product entitlements. To activate all the entitlements in your bucket, click the 'Activate All' button:
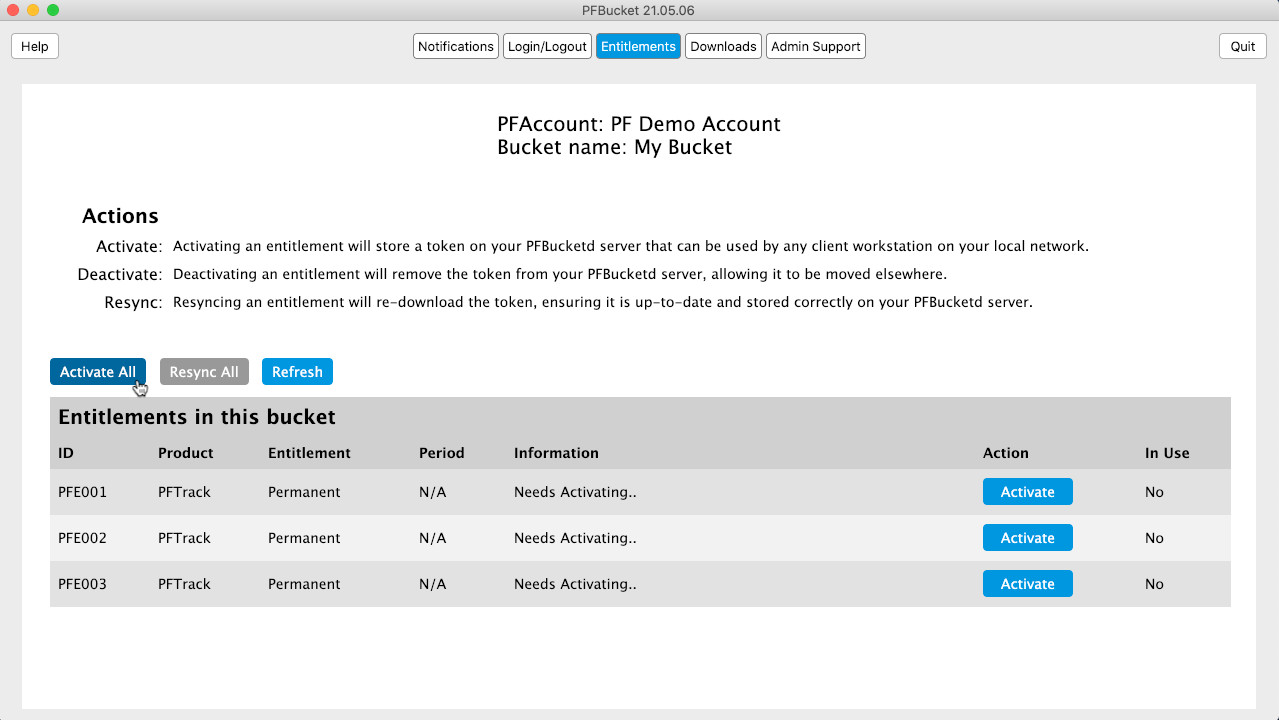
This will generate a token for each entitlement and store it on your PFBucket server:
6. Install your applications
Once your product entitlements are active on your server, you can download installers for your applications using the 'Downloads' tab, or by logging in to the PFAccount Admin Hub.
You can install and run applications on any workstation on your local network that can communicate with your PFBucket server.
7. Connect workstations to PFBucket
When an application is launched on a client workstation, it will automatically attempt to contact your PFBucket server on your local network and obtain an entitlement to run.
If a connection cannot be made automatically, you can tell your workstation the IP address of your PFBucket server. Further information is available on the Connecting Workstations page.
8. Check your server status
When your PFBucket server is up and running, you can view an information webpage to quickly see which entitlements are available without needing to run the PFBucket desktop app again.
Further information on how to do this is available on the Server Status page.