


Working with nodes
Creating nodes
New Media Bins can be created in the Media Manager, whereas all other nodes are created in the Workflow Manager. The other nodes can be created by clicking the + buttons on the left for the required node.
Selecting nodes
Nodes in the Workflow Manager are selected by clicking on them using the left mouse button. Multiple items can be selected by holding down the Control key while selecting. By dragging with the left mouse button a rectangle can be drawn and all items within that area are selected.
Selected items are shown with a white border:
Moving nodes
Nodes may be moved horizontally, but not vertically, by dragging them with the left mouse button. If the node being moved is part of the group of nodes currently selected, then all selected nodes are moved. Holding down the Shift key while moving a node will also move any nodes connected to it downstream.
Note that the Media Manager can not be moved and is always displayed in the centre of the Workflow Manager. Media Bin and File Out nodes can be dragged to reorder the sequence in which they are display, but they are always placed in the centre of the Workflow Manager.
Deleting nodes
Nodes can be deleted from the Workflow Manager by right clicking the node to bring up a popup context menu for the selected node. Select Delete from the context menu to delete the node.
The Media Manager can not be deleted nor can non-empty Media Bins or the last remaining Media Bin or File Out node of project.
Connecting and disconnecting nodes
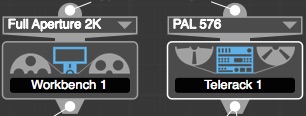
The flow of clips is represented by connections between nodes. Two nodes can be connected by dragging a line from a nodes output connector to another nodes input connector.
As the line is dragged its colour coded to show the validity of the potential connection. A red line indicates no connection is possible, a green line that a connection is possible.
Note: Clips flow in the Workflow Manager from Media Bins at the top towards File Out nodes at the bottom. Any nodes output can only be connected to a node located further down. Fixed horizontal layers for each node type represent possible connections. With the exception of the Remaster node, a node can only have a single input.
The number in the middle of the connection indicates how many clips are flowing through it.
A connection between two nodes can be broken by clicking on the link. The link will turn yellow with the words Del? displayed. Clicking the link again will confirm the disconnect action. Moving the mouse away from the connection will leave the connection intact.
Note: Rearranging node connections can have a fundamental effects on clips. For example, disconnecting a Media Bin node from a Workbench node will cause any cleanup work you performed in the Workbench to be removed from the clips, since those clips are now no longer flowing through the Workbench where the effects are conceptually applied.
Renaming nodes
Nodes can be renamed by double clicking the the node's name.
In-use nodes
If a node can not be interacted with, say deleted or connected to, then this usually indicates that the node is in use by other parts of the application and so can not be modified.
A quick way of seeing if a node is in-use is the fact that the black surround to the nodes name turns grey to indicate the node can not be renamed. Alternatively, press and hold the i key to show an overlay on each node that indicates what other part of the application is using the nodes preventing it from being modified.
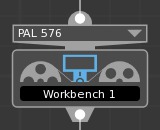 | 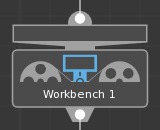 | 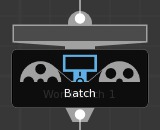 |
|---|---|---|
| A node not in use | A node in use | A node in use with overlay applied |