Connecting to PFBucketd
The launch window is displayed when PFTrack starts, and will help you connect to your PFBucketd server. It is composed of three main areas:

Information about your workstation, including the machine type (Physical or Virtual), your PFHostID, and your machine name.
The PFBucketd server list. This will display any PFBucketd servers that you can connect to, and also allow you to manually add an IP address for your server.
The Launch button. Once a PFBucketd server is available, clicking the launch button will start PFTrack and connect to your server.
Further details on network configuration for the PFBucketd server daemon are available here.
Automatic Connection
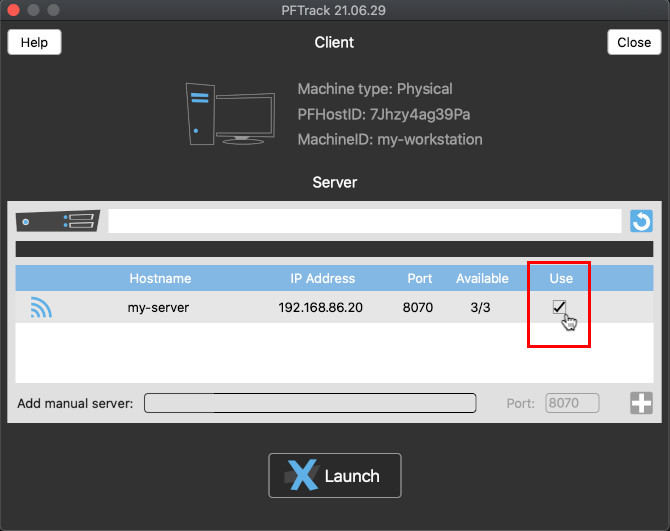
When PFTrack first runs on your client machine, it will attempt to connect automatically to a PFBucketd on your local network using a local area broadcast.
If a connection can be made automatically to your PFBucketd server, the server Hostname and IP address will be displayed in the server list, showing the number of available PFTrack entitlements. Clicking the Use column for your server will enable the Launch button and allow you to start PFTrack:
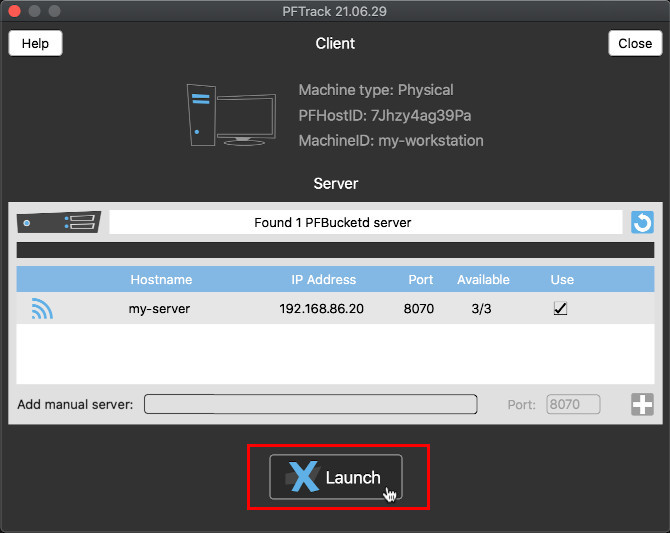
Once a server is available to use, clicking the Launch button will start PFTrack:
Manual Connection
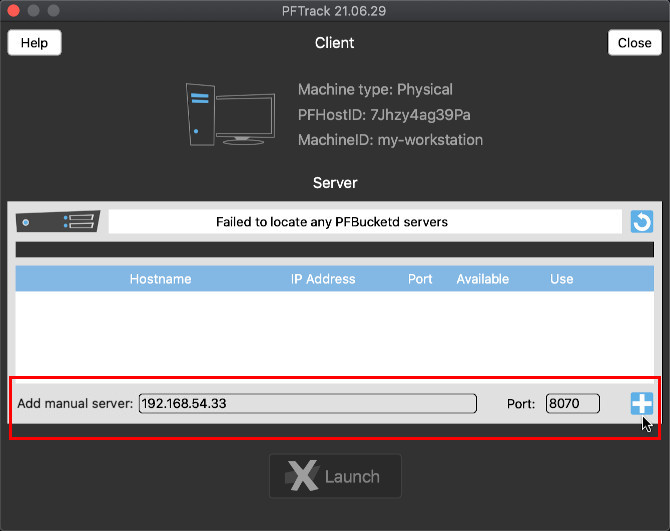
If no connection can be made automatically, for example due to network configuration restrictions, you can manually enter the IPv4 address or host name of your PFBucketd server (and optional port number) in the boxes below the server list.
For example if the IP address of your server is 192.168.54.33, you should enter this value and click the  button to add your server to the list:
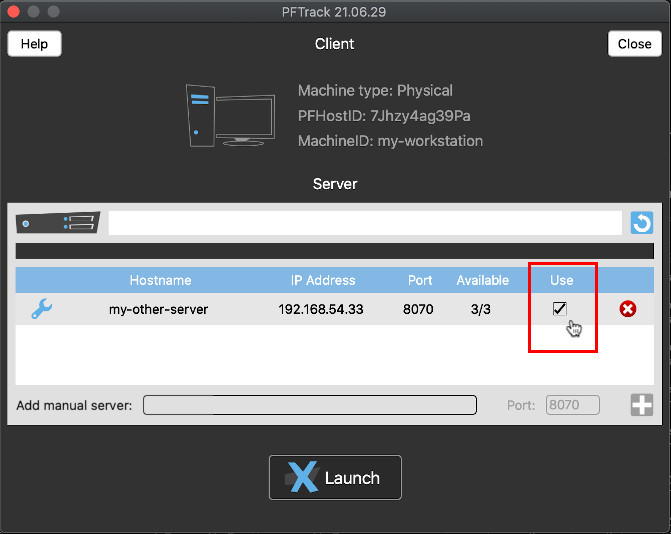
Once a server is added, a check will be started to see whether a connection can be made to your server. If this succeeds, the number of available entitlements will be displayed and you can launch PFTrack:
Re-Launching PFTrack
Next time you start PFTrack, you don't need to specify which PFBucketd server you wish to use provided PFTrack can still connect to the last server.
In this case, PFTrack will connect automatically in 5 seconds time. If you wish to stop this and connect to a different server, just click the  button:
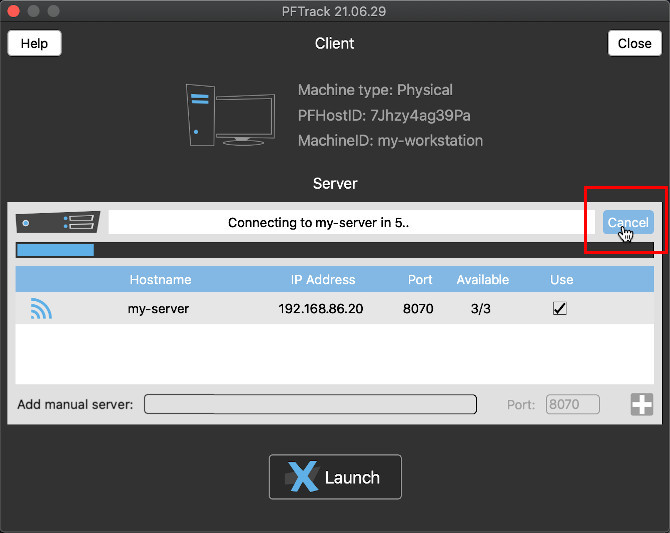
You can also connect immediately if you wish by clicking the Launch button.
Environment variable
Instead of manually entering an IP address to connect to, you can also use the PIXELFARM_PFBUCKETD_SERVER environment variable.
This should be set with the IP address (and optional port number) for your PFBucketd server:
XXX.XXX.XX.XX:8070
where XXX.XXX.XX.XX is the IPV4 address of your PFBucketd server.
For example, if the IP address of your PFBucketd server is 192.168.54.33 and you are using the default port number of 8070, the environment variable should be set to:
192.168.54.33:8070
After re-starting PFTrack, this IP address will be added automatically to the server list where it can be selected for use before clicking the Launch button.
Troubleshooting
If a connection to your PFBucketd server cannot be made, you can click on the server entry in the list to see the error message. This may include information about connection problems on your network, whether your entitlements have expired, or maintenance has expired and needs renewing:
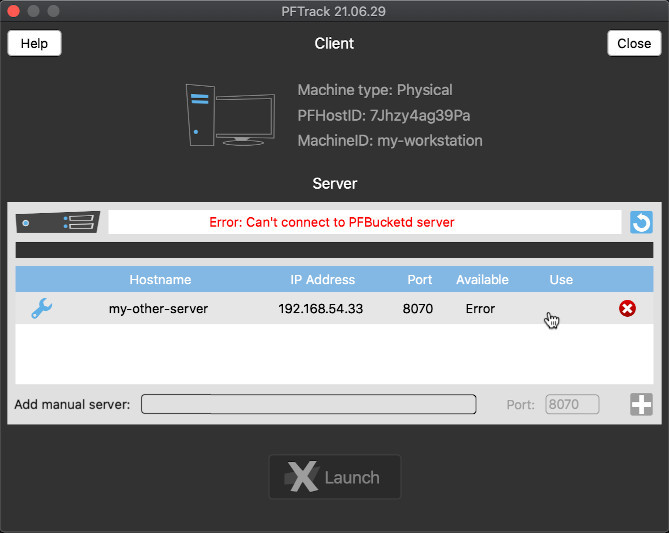
If you are unable to connect to your PFBucketd server, please check the IP address and port number for your server, and make sure your PFBucketd server is running.
Further information about configuring the PFBucketd server daemon is available here.