


Viewer Windows
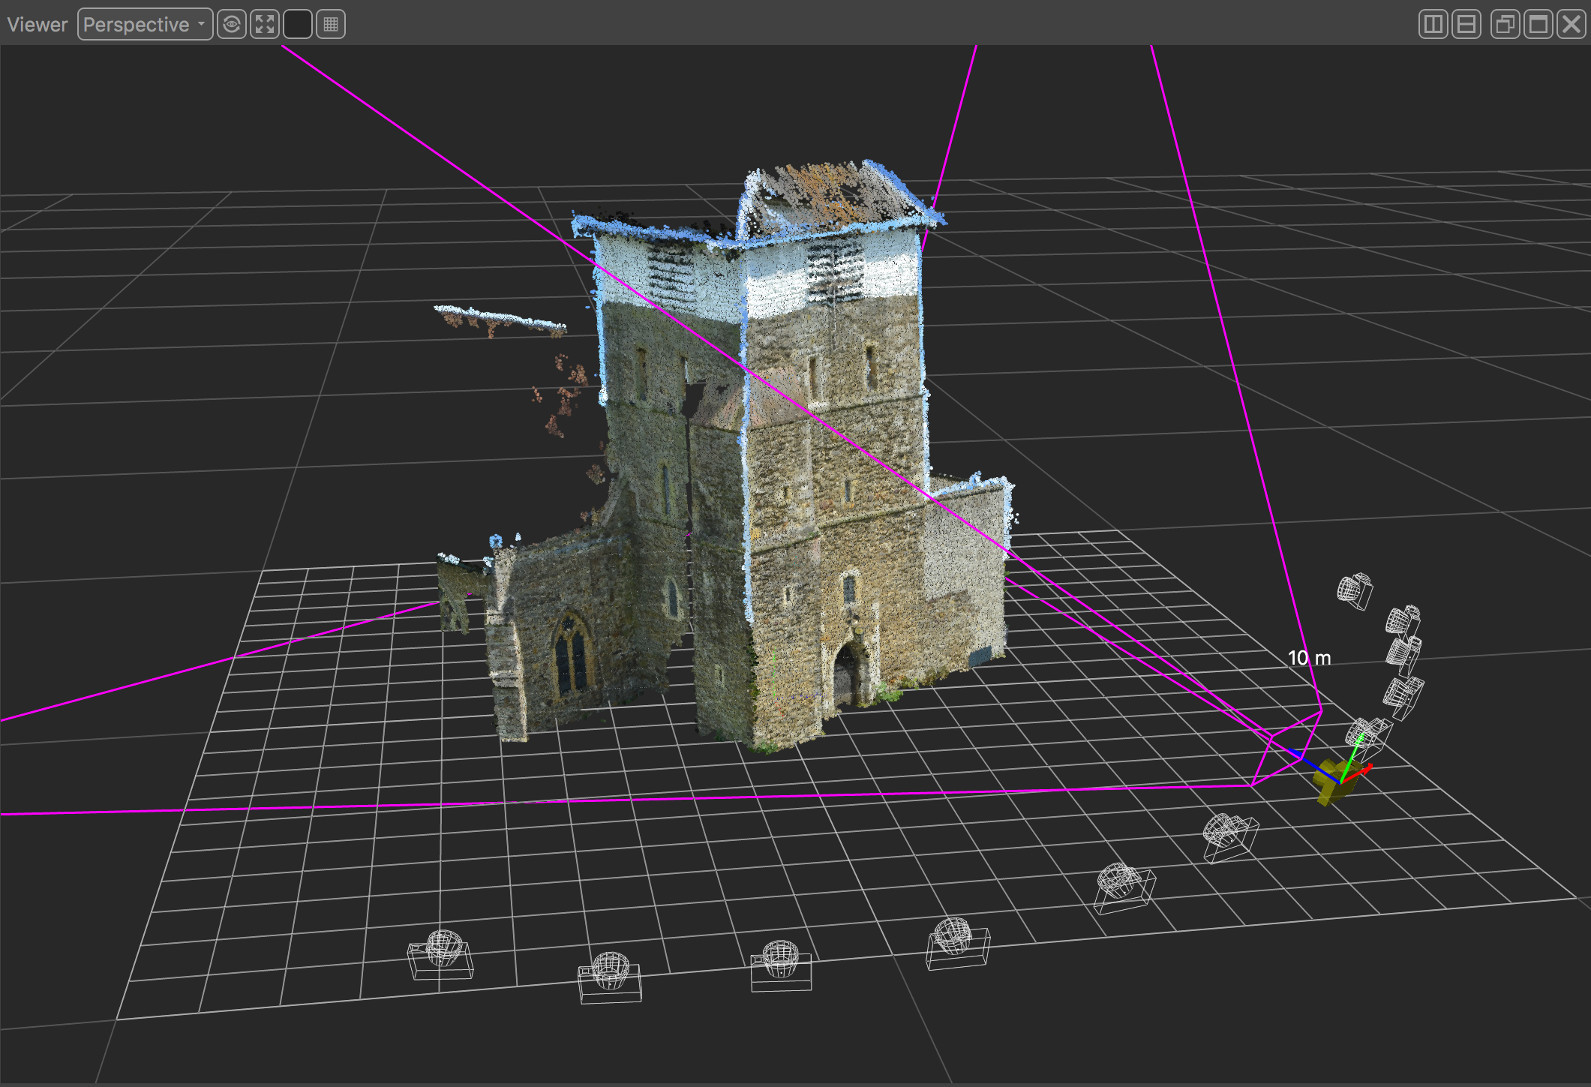
The Viewer windows are where PFTrack displays contents of 3D space from either an independent perspective or orthographic viewpoint.
When a node is activated in the Workpage (by double-clicking with the left mouse button), it will automatically display its 3D data in all Viewer windows. If multiple inputs are connected to the node, each containing different data, controls in the node editor can be used to adjust what is displayed. Further details are given the Node Reference documentation where appropriate.
The ground plane
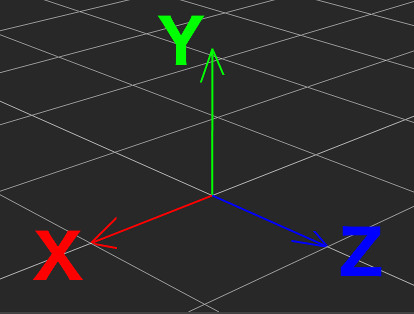
A ground plane is displayed in each Viewer window, along with an X, Y, and Z axis indicator at the origin point (0, 0, 0).
PFTrack uses a left-handed coordinate system with Y as the vertical direction. The X, Y and Z axes are colour-coded red, green, and blue respectively.
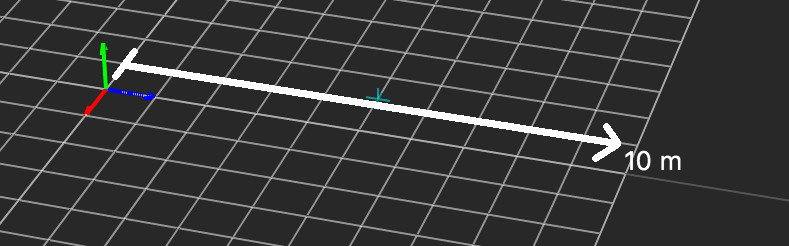
At the edge of the central ground plane area, a measurement value is given indicating the size of the central area in scene units. This is the distance from the origin to the indicator position. Scene units can be changed in the Preferences window.
Viewer navigation
The position from which the ground plane and 3D data is viewed can be adjusted using the left, middle and right mouse buttons to rotate, zoom and translate the Viewer respectively. The Viewer can also be zoomed using the mouse wheel (Note: viewer rotation is not available in orthographic modes).
When using the left mouse button to rotate, the Viewer position will orbit around the transformation origin, which is displayed in the window as a blue cross:

The transformation origin will move as the Viewer is translated with the right mouse button.
It can also be quickly positioned at any point in the scene by double-clicking with the left mouse button on a scene element.
Mouse controls
Click and drag with the left mouse button in perspective view to rotate the view.
Click and drag with the middle mouse button (or use the mouse wheel) to zoom the view. Holding the Control key will reduce the scaling factor to 10% of the default for finer grain control.
Click and drag with the right mouse button to pan the view.
Double-click with the left mouse button on a scene element to quickly move the transformation origin to that point.
Buttons
 : Select the Viewer type for this window. Options are:
Perspective (providing a full 3D viewpoint),
Ortho Left (along positive X axis),
Ortho Right (along the negative X axis),
Ortho Up (along the vertical Y axis),
Ortho Down (along the negative Y axis),
Ortho Front (along the positive Z axis),
Ortho Back (along the negative Z axis).
 : Reset the Viewer position to default state.
 : Adjust the view's camera position to fit data to the available viewport space.
 : Display a colour selection window to change the background colour for this viewer window.
 : Display a colour selection window to change the colour and opacity of the ground plane.
Note that on some platforms, if the graphics driver is set to synchronise to vertical blanking, displaying multiple viewer windows can sometimes reduce overall performance. In these situations, disabling the sync option in the graphics driver control panel will ensure the best overall performance is achieved.